Okay, so maybe doing a clay project with brand new fifth grade students just a month into school seems a little ballsy, but I'm telling you, these are AMAZING. No doubt, a little petrifying, but AMAZING.
What you'll need:
-About 1lb of clay per student. I've got a little kitchen scale in my classroom, and it's great for times like these. I pre-cut and put in quart freezer baggies.
-Newsprint or old newspapers, about half a 9"x12" for each student.
-Slip and clay tools, I use cheap metal forks as a primary clay tool for my kiddos. The fork end is perfect for scoring, and the handle end is great for smoothing. Needle tools are also really helpful for this project.
Steps to complete this project:
Since this was the first time using clay for many of my students, I made extra sure to explain thickness and air bubbles. I explaining that air bubbles get trapped inside the clay when it's too thick and they get really hot and really angry, and they just have to bust out! Of my 31 students working on this project, only one exploded, so I would like to think I did a pretty good job explaining! That said, I did attempt to fire a set too soon, and those all exploded. My girls were kind enough to re-make them, but learn from my mistake- DRY CLAY ONLY INTO THE KILN!
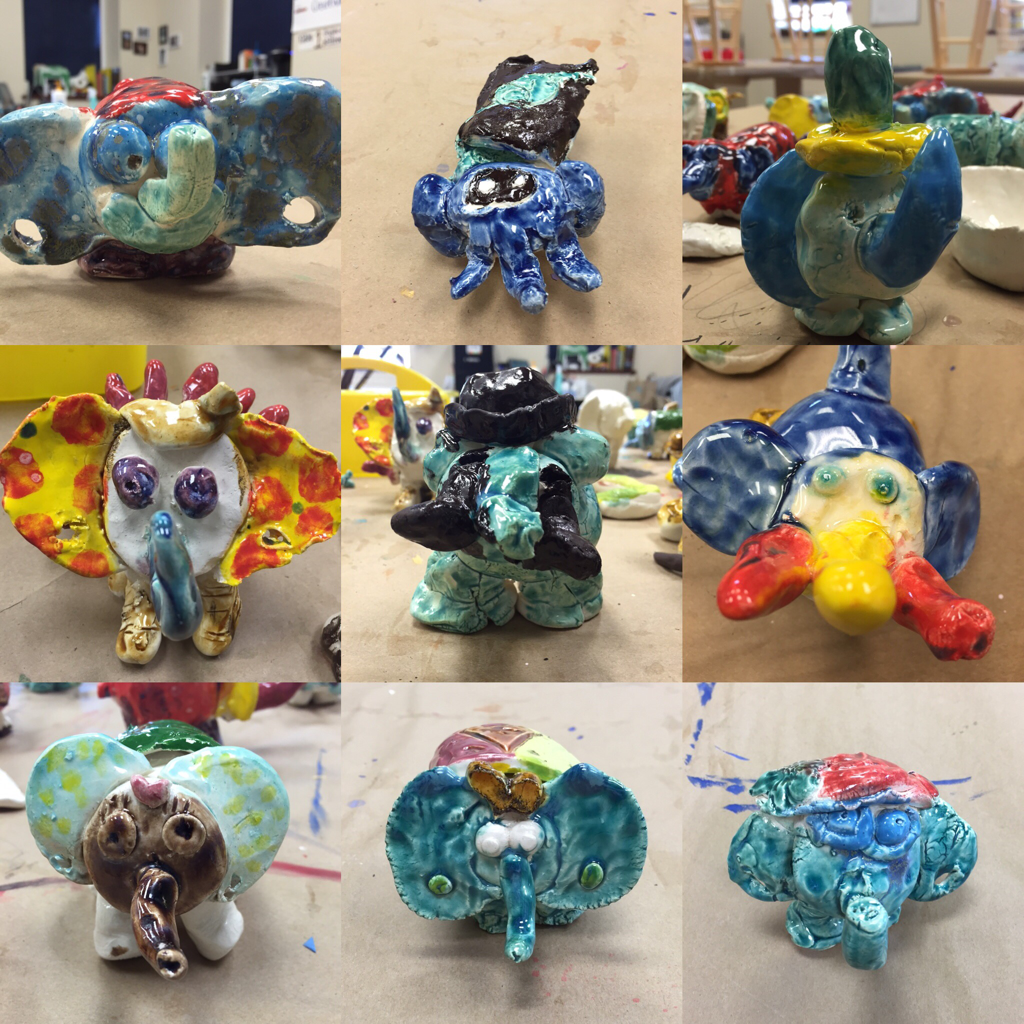
For glaze day, I put different color groups on each of my four tables, and brushes that stay WITH the glaze. The kids stay silent while they move around to get the colors they need. Since we were working with a circus theme, I let them use pretty much any colors they wanted.
All in, I couldn't be more pleased. Best of all, the kids are tickled pink and can't wait to see what else we make this year! I think I'll call in a big, fat, win on this one!
What you'll need:
-About 1lb of clay per student. I've got a little kitchen scale in my classroom, and it's great for times like these. I pre-cut and put in quart freezer baggies.
-Newsprint or old newspapers, about half a 9"x12" for each student.
-Slip and clay tools, I use cheap metal forks as a primary clay tool for my kiddos. The fork end is perfect for scoring, and the handle end is great for smoothing. Needle tools are also really helpful for this project.
Steps to complete this project:
- Split the pound of clay in half. Plan on using one half for the body, and the other half for physical features!
- With the half for the body, make two spheres (not balls, because balls are funny!). Turn these into the prettiest pinch pots you've ever seen. They should be reasonably thick walled, think the thickness of a double stuffed Oreo!
- Crumple some paper and stick it in one of the pinch pots. Then score and slip the rims and stick them together. Smooch the pots together so you end up with one nice elephant body (or cylinder)! Don't worry about the paper, it's in there for good!
- From the remaining clay, make four legs (roll four equally sized cylinders- be sure they are fat enough to hold up the body), one head (an Oreo cookie), two ears (another Oreo, cut in half), a trunk, and a tail.
- If you're short on time me, have the kiddos put all of their body parts back in the bag (carefully) and store until your next class. I found that I could do a demo and build in just one period (1 hour and 15 minutes). Since we had time, I made sure all the kids slipped and scored all of the elephant parts together. Once done, we poked a bunch of holes in the underside of the belly- heellloooo giant air bubble! I also put my student's initials on the bottom.
- I let students make what they wanted with their leftover clay. I also gave groups of four an extra pound or so of clay for accessories. Many of my boys added tusks, while my girls made baby elephants and skirts.
- Once dry, I bisque fire to come 04, and let the kids glaze. I fire again to cone 05. I found that for the glaze fire, putting elephants on their backs on the stilts was much easier than praying they didn't stick on the bottom! Before each fire we all say a little prayer that all the elephants make it in the kiln.
Since this was the first time using clay for many of my students, I made extra sure to explain thickness and air bubbles. I explaining that air bubbles get trapped inside the clay when it's too thick and they get really hot and really angry, and they just have to bust out! Of my 31 students working on this project, only one exploded, so I would like to think I did a pretty good job explaining! That said, I did attempt to fire a set too soon, and those all exploded. My girls were kind enough to re-make them, but learn from my mistake- DRY CLAY ONLY INTO THE KILN!
For glaze day, I put different color groups on each of my four tables, and brushes that stay WITH the glaze. The kids stay silent while they move around to get the colors they need. Since we were working with a circus theme, I let them use pretty much any colors they wanted.
All in, I couldn't be more pleased. Best of all, the kids are tickled pink and can't wait to see what else we make this year! I think I'll call in a big, fat, win on this one!